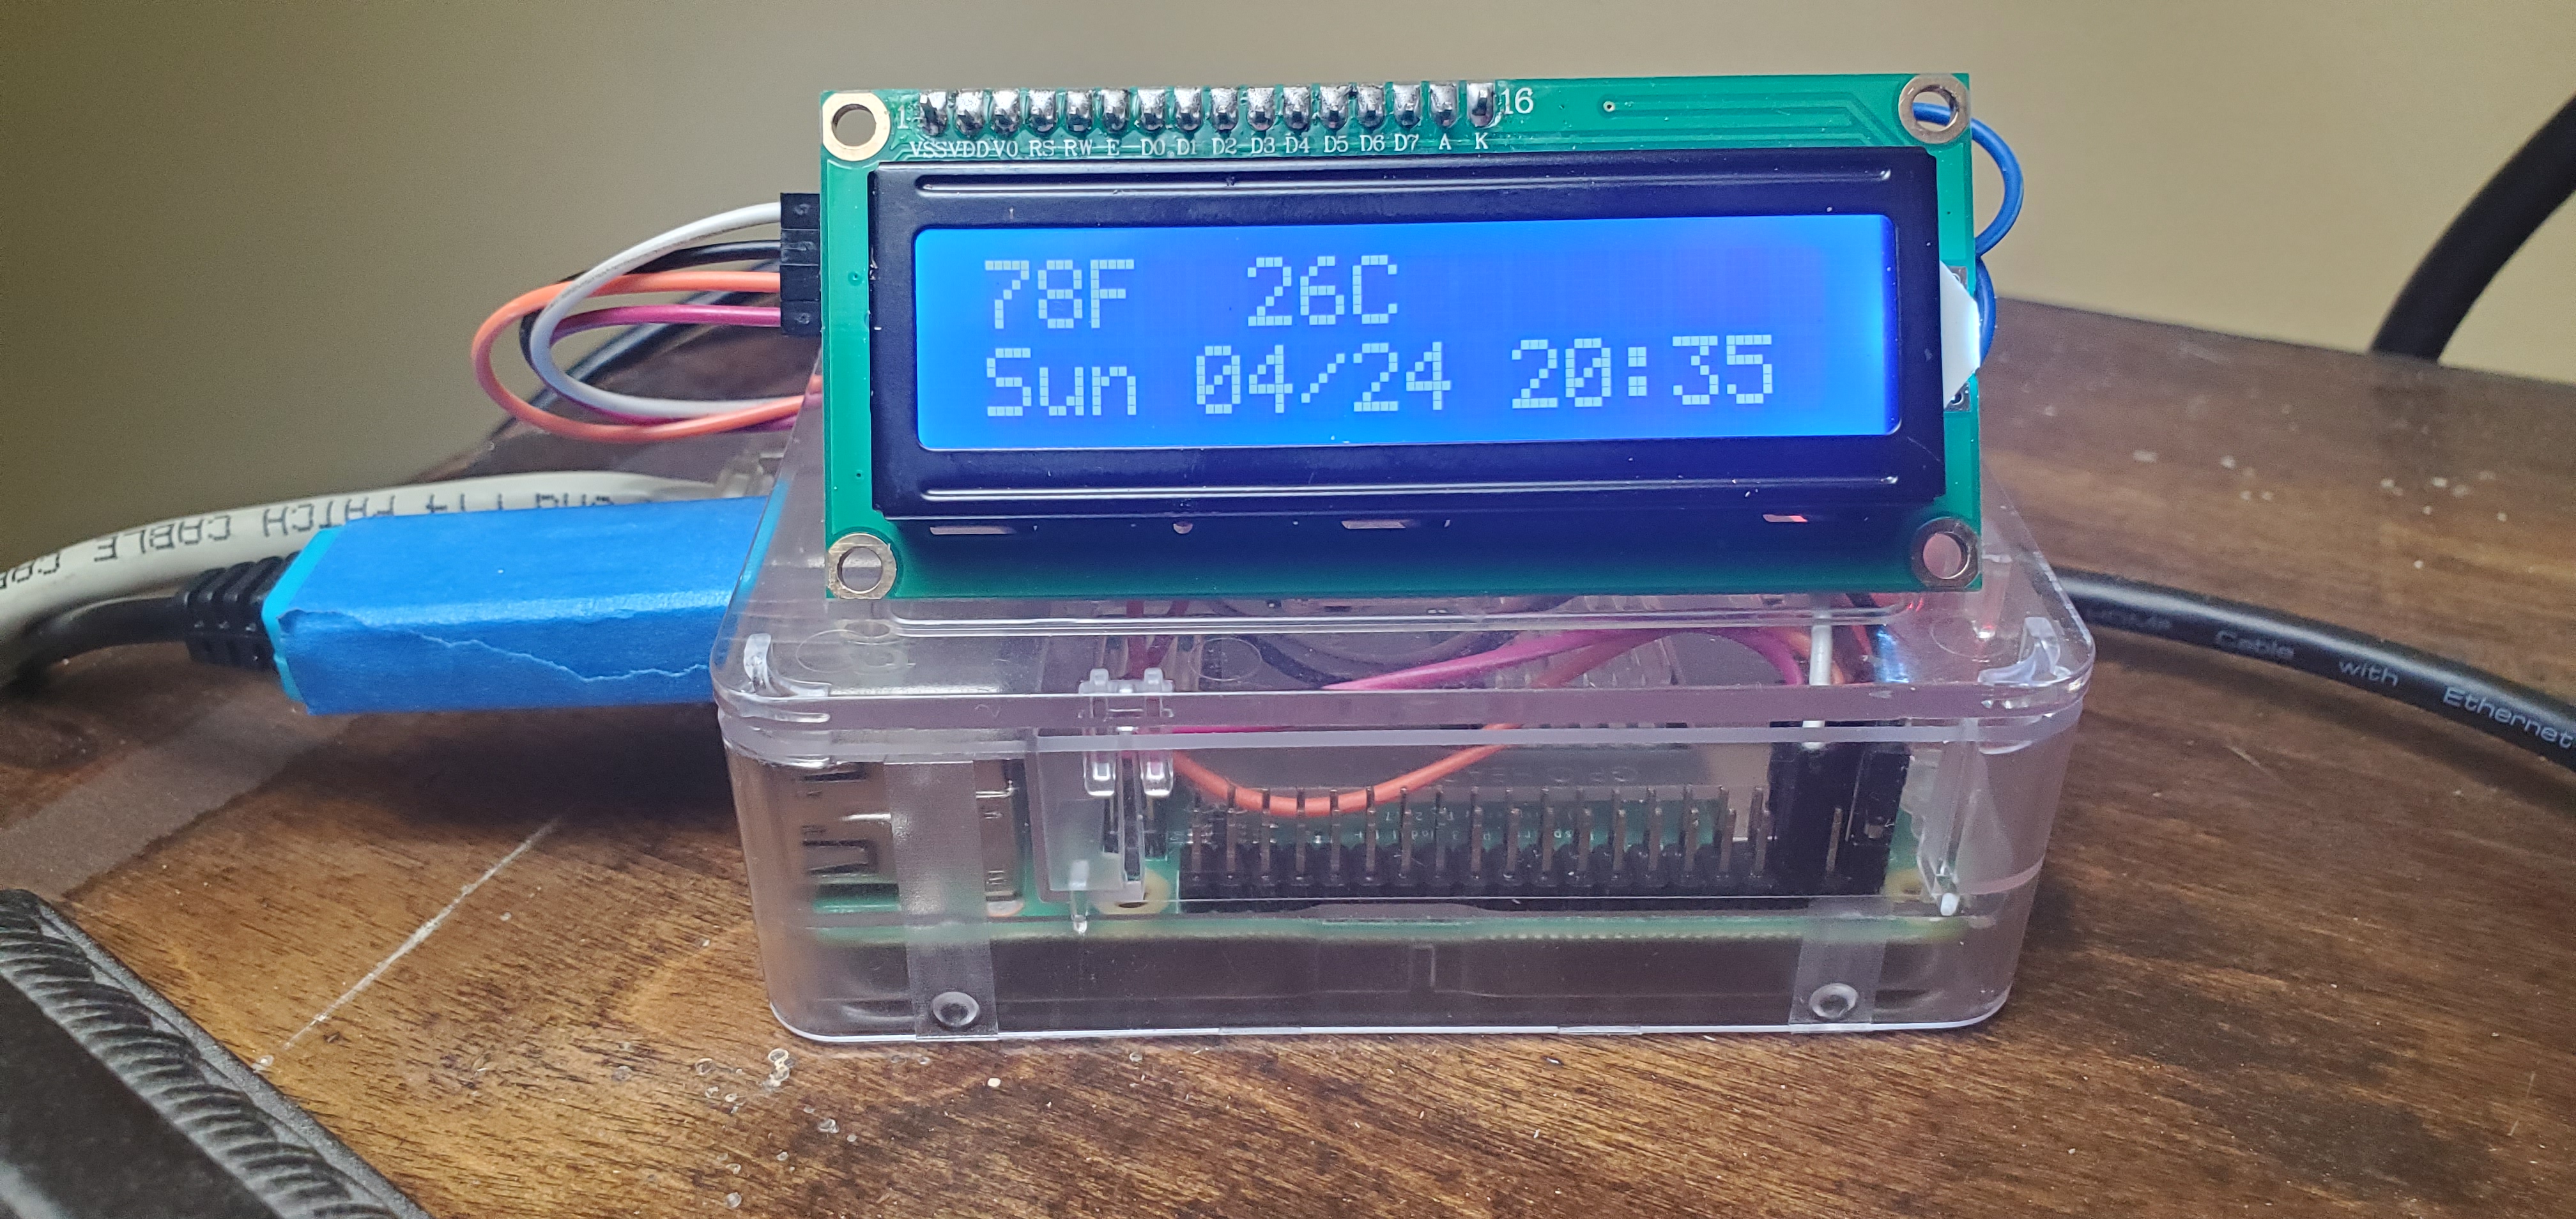
Thermometer Pi

Project Background
A common problem that exists with US home construction is that multiple story homes were built with a single zoned HVAC system. Often times, that thermostat is on the first floor and can properly manage the temperature on the first floor. However, the second floor often times gets too hot because heat rises and cold air sinks.
Several houses in the neighborhood have window AC units installed in the rooms on the upper floor of their house and so do I. The thing about the window units is that they have basic thermometers on them. Thus I built a .NET Core application that will read the temperature from a temperatture sensor connected to a Raspberry Pi. Home Assistant has been configured to connect to the Raspberry Pi via API to get the current temperature. Then based on automation rules, will either turn on or off the window air conditioner units.
I have several Rapsberry Pi (or Raspberry Pis) that are used in my home and used as television set top boxes. Instead of purchasing additional devices to detect temperature, I decided to get some one-wire temperature sensors that can be connected to the Raspberry Pi that is already in the rooms that I want to monitor.
The application was build using .NET 5.0 Web API template. The way it works is that a GET call is made to the API. The API runs a process to get the current temperature from the temperature sensor and then returns it back to the caller as a JSON object. That JSON object returns the Fahrenheit and Celsuis temperature readings.
- Year Started: 2021
- Technologies: C#
Components Used
- Raspberry Pi
- DS18S20 Temperature Sensor
- Serial to USB Cable
- Home Assistant (on same or different device)
- Belkin Wemo Smart Outlet
- Window AC Unit
- 16x2 LCD Display
Installation and Setup
- Connect the DS18S20 sensor to the Serial to USB Cable
- Install an operating system of your choosing on your Raspberry Pi
- Copy the Thermometer Pi files to the Raspberry Pi. They can be downloaded from the project repo.
- Perform the first run steps to configure the temperature sensor
- Set up the ThermometerAPI as a system service
- Start the service
- Set up a REST sensor in Home Assistant
- Set up automations in Home Assistant
First Run
This is the full output when running the commands that are listed on the external resource website. Note that I did have to use sudo as it state that my user ID did not have permission to access /dev/ttyUSB0
Install the digitemp software
sudo apt-get install digitemp
After the installation has completed, then run the the command below for the configuration file to be created.
sudo digitemp_DS9097 -i -s /dev/ttyUSB0 -c /etc/digitemp.conf
This command above will produce the below output.
DigiTemp v3.7.2 Copyright 1996-2018 by Brian C. Lane
GNU General Public License v2.0 - http://www.digitemp.com
Turning off all DS2409 Couplers

Searching the 1-Wire LAN
28711E92070000F3 : DS18B20 Temperature Sensor
ROM #0 : 28711E92070000F3
Wrote /etc/digitemp.conf
Confirm that the sensor is readable with the configuration file.
sudo digitemp_DS9097 -a -q -c /etc/digitemp.conf
This will produce the below output.
Apr 10 13:05:42 Sensor 0 C: 29.81 F: 85.66
To be able to read the sensor data without using sudo, then you will need to add the user(s) to the dialout group.
sudo usermod -a -G dialout $USER
Replace "$USER" with the username(s) that need to be added to the group. May need to logout or restart the system for the changes to take effect.
To check to see what groups that the user has been added to, you can run the command
groups $USER
replacing $USER with the username that you want to see.
Application as System Service
Create System Service
sudo cp thermometerapi.service /lib/systemd/system
sudo systemctl daemon-reload
sudo systemctl enable thermometerapi
sudo systemctl start thermometerapi
sudo systemctl status thermometerapi
Remove System Service
sudo systemctl disable thermometerapi
sudo systemctl stop thermometerapi
sudo systemctl status thermometerapi
sudo rm /lib/systemd/system/thermometerapi.service
Application Logs
To view the application logs, run the following command
sudo journalctl -u thermometerapi -b
or by tailing the system log
tail -f /var/log/syslog
Application logs will look similar to the below to show what the application is doing.
info: Microsoft.Hosting.Lifetime[0]
      Now listening on: http://[::]:8005
info: Microsoft.Hosting.Lifetime[0]
      Application started. Press Ctrl+C to shut down.
info: Microsoft.Hosting.Lifetime[0]
      Hosting environment: Production
info: Microsoft.Hosting.Lifetime[0]
      Content root path: /home/osmc/thermometerpi
warn: Microsoft.AspNetCore.HttpsPolicy.HttpsRedirectionMiddleware[3]
      Failed to determine the https port for redirect.
info: Almostengr.ThermometerPi.Api.Controllers.ThermometerController[0]
      At 9/28/2021 9:09:14 PM temperature is 25.88
info: Almostengr.ThermometerPi.Api.Controllers.ThermometerController[0]
      At 9/28/2021 9:09:28 PM temperature is 25.88
LCD Connections
Below are which pins should be connected to the I2c LCD.
- Pin 2 - Power
- Pin 6 - Ground
- Pin 3 - Data
- Pin 5 - Clock
Source Code
The source code is available on my GitHub Repository.
Additional Resources
Below are resources that were used in completing the project.
https://martybugs.net/electronics/tempsensor/usb.cgi