8 Steps to Replace A Toilet Fill Valve
The toilet in the bathroom, I discovered that the toilet was continuously running. When my place was quiet, I heard a noise coming from the bathroom. It was not loud.
I removed the lid of the tank and to my suprise the water was at the top of the overflow tube. Definitely not a good sign.
Not sure how long it had that slow leak, but I wanted to fix it before it got worse. I immediately shut off the water to the toilet to prevent any more water from being wasted.
I have other bathrooms that I was able to use, so I was not concerned with this one leaking. However, if you only have one toilet and choose to turn the water off, you will need to turn it on after each flush so that it can refill.
I'll share with you the 8 steps that I took to replace the fill valve on a toilet.
1) Gather The Tools Needed
In order to complete the job, you will need the following:
- towel(s)
- bucket or bowl (optional)
- pliers
- replacement fill valve
- replacement supply line (optional)
- Teflon tape (optional)
2) Shut Off The Water
Before you do anything, turn off the water. If you do not turn off the water before disconnecting the hoses or the fill valve, then you will flood your bathroom.
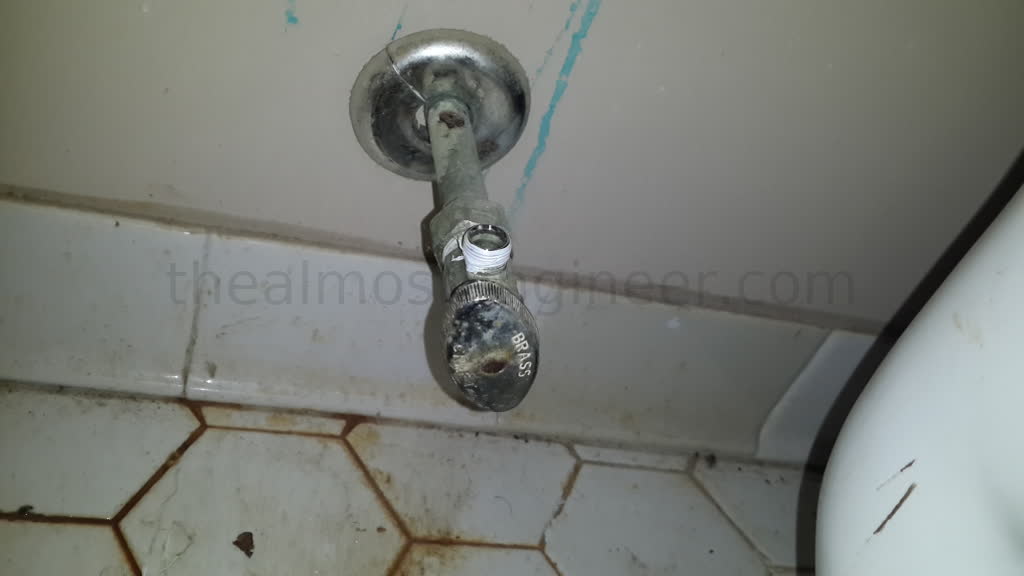
To turn off the water, you can turn it off at the shut off valve on the left side of the toilet.
If you do not have a shut off valve next to the toilet, then you will have to turn off the water to the entire home. This shut off valve could be located either outside or in the basement of the home.
Once you have located the shut off valve, turn the knob to the right until it stops.
3) Remove the Water
Remove the lid from the toilet tank (aka the back of the toilet). Flush the toilet and hold the lever down until most or all of the water runs out.
Then you will need to remove the remaining water using one of the following methods:
- use a towel to soak up the water and wring it out in the bowl or sink
- allow the water to evaporate (the method I chose); this may take a couple of weeks to happen
- Jump to step 5 and replace a bucket below the fill valve opening before you unscrew it
4) Purchase Replacement Parts
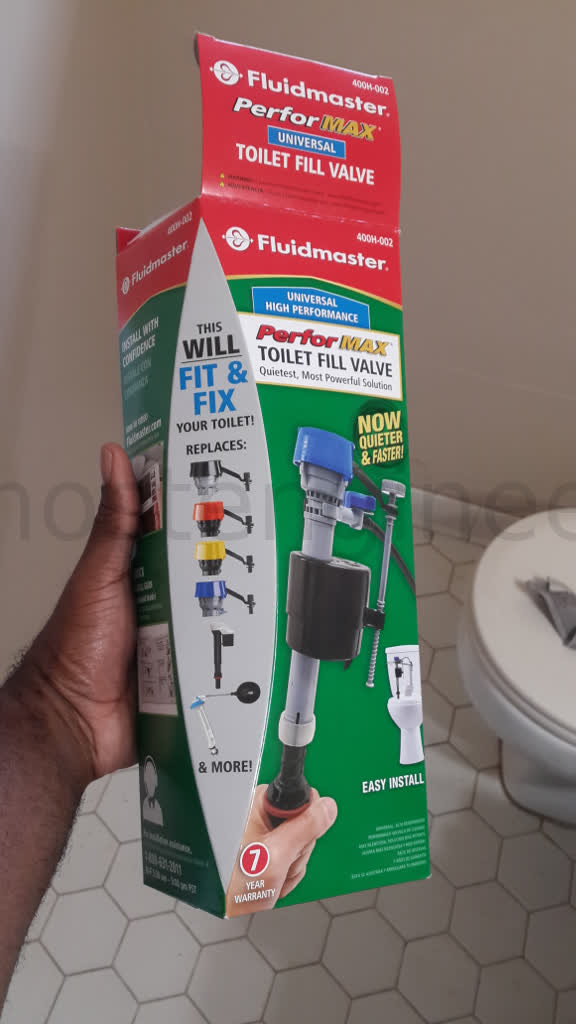
You will need to get a replacement fill valve. I bought a universal one, similar to the one pictured above. It has the same size fitting that connects to the water supply line.
I also bought a replacement supply line. You do not have to do this. However, in the past 4 years, I have replaced almost all of the working parts of this toilet. Thus going ahead to replace the supply line as I do not know how long ago it was replaced.
5) Remove Old Fill Valve and Supply Line
I disconnected the supply line from the water line and the fill valve. You may have to use a pair of pliers to disconnect the line.
If the water line (that is the pipe that comes out of the wall) has Teflon tape on it, you will want to remove it at this time. Teflon tape is white, but pay be discolored depending on how long it has been on the fitting.
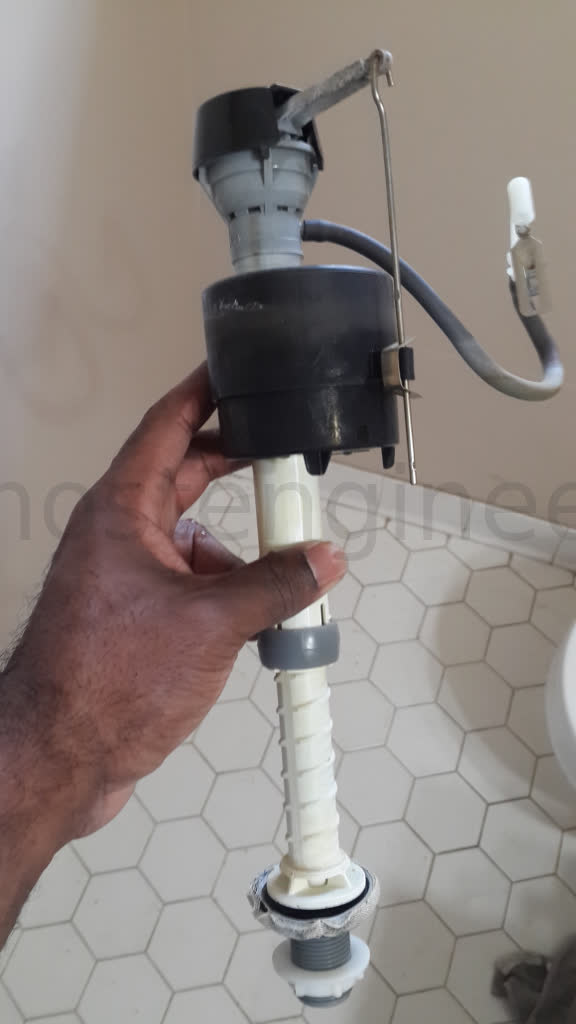
Then I removed the fill valve from the tank, by removing the nut that is located on the bottom side of the tank.
I was kinda suprised that this had not started leaking sooner. If you notice at the bottom of this valve, the rubber gasket has significantly warped to the point that it was no longer in its original shape.
6) Install New Fill Valve and Supply Line
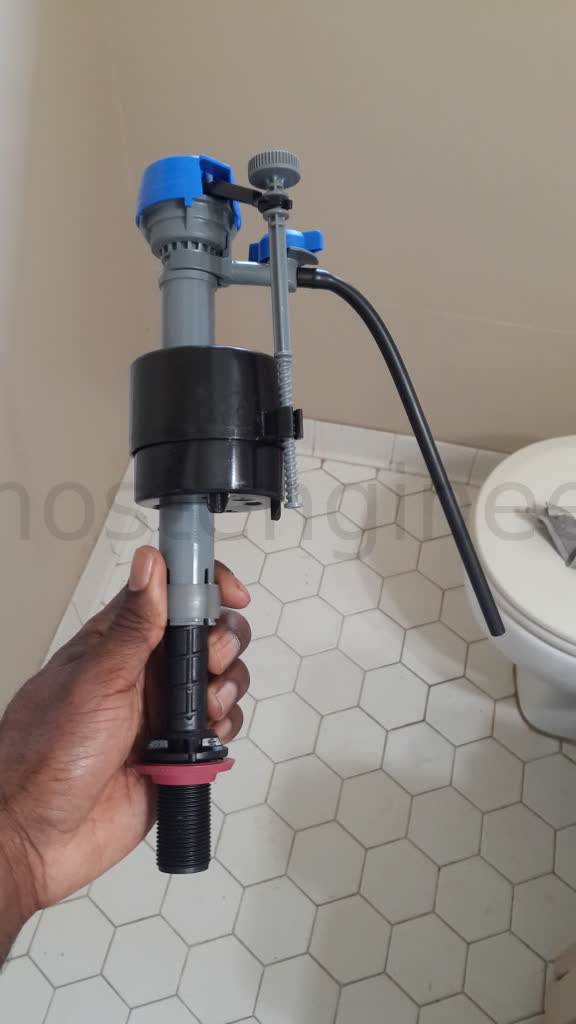
The fill valve that I purchased, has an adjustable height. Per the instructions listed on the box, I the fill valve needs to be 3 inches higher than the overflow tube. Following the instructions on the box, I adjusted the height of the valve to the approximate height that it needed to be.
Do not use pilers or tools when tightening plastic parts.
Do not use pilers or tools when tightening plastic parts.
I say this twice because it really is important. The reason being is that you risk stripping or breaking the plastic parts. Plastic parts are usually designed to be hand-tightened only. If you break a plastic part, there is a chance that you will not be able to buy the broken part by itself, thus wasting money.
What I did not realize until after the fact, was that the fill valve that I removed also had an adjustable height. Coincidentally, I set the new fill valve to the same height as the old fill valve that I removed.
Before installing the new supply line, put on new Teflon tape. The reason that the Teflon tape is used to fill the gap that may exist between two connections or fittings. It is especially recommended that it be used on metal to metal fittings as they may leak of the rubber gasket is not seated properly.
I only put the Teflon tape on the metal fittings. However, you can use it on the plastic fittings as well.
7) Turn On The Water
Once you have checked and double checked the connections, slowly turn on the water. If you turn on the water slowly, then you are less likely to have a flood if a leak springs. Furthermore, if you turn the water knob 5 times and then find a leak, you have to turn it in the opposite direction 5 times to stop the water.
Flush the toilet several times to make sure that the fill valve works as it should.
8) Adjust the Fill Rate
This particular fill value has adjustable knobs for the tank water level and the bowl water level. Be sure to adjust these accordingly so that you are not wasting water by overfilling.
Conclusion
This was a rather quick replacement. In total, it took about an hour to complete. Part of that was having to walk back and forth to get tools and supplies. Also testing repeatedly to make sure that it works as it should.